Saturday, July 31, 2010

I spy with my little eye ...

... Hobbes sun-bathing in the loft!

Photobucket

Photobucket

Photobucket

Ever since we put a sofa in the loft she's claimed it as her new favorite spot for sunning and bathing.

Sunday, July 25, 2010

The loft: its done!

Our loft has had a few looks. It started out like this:

Photobucket

And then was in a variety of disarrayed states like this:

Photobucket

Finally ... after painting, replacing the blinds & ceiling fan, and decorating it now looks like this:

Photobucket

Yay!

Apart from the TV (we got a new one for the family room with our tax return money so this one moved up here) we literally had nothing for the room. We didn't want to spend a fortune putting it together and managed to find some great bargains.

The inexpensive TV stand came from Target and as you already know, we made the bookcases ourselves.

Photobucket

The sofa was a great find from Craigslist. Its the Ektorp sofa from Ikea and its the same one we have in the living room (with a different slip cover). Its in perfect condition and was a steal at only $210!

Photobucket

As you can see we have a lot going on on that wall behind the sofa. Josh and I have a pretty extensive Pearl Jam poster collection and we hate that most of them spend their life in an art folder so we decided to cram in as many as we could. It would probably be a bit much (maybe it still is?) if it was a totally walled in room but the half wall keeps things feeling nice and open and makes up for the poster madness!

Instead of a coffee table we opted for padded ottomans that we can put our feet up on. I found them on clearance at Target for $20 each - woohoo! It was pure luck that I found them for such a great price and in a nice dark gray that goes so well with the bookcases.

Photobucket

The tray used to be in the living room and is perfect for balancing a refreshing beverage!

I looked around and couldn't find the perfect pillows so I decided to make my own. Josh picked the fabric and I did the sewing. If you know how to sew, making your own is so much cheaper than buying them - they cost me about $7.50 each, including the insert (which I made with muslin and fiberfill) - not bad for custom pillows!

Photobucket

The ceiling fan has a light but I wanted additional task lighting and we were excited to find this guy at Ikea. Its quite heavy and looks much more expensive than its $50 price tag.

Photobucket

Photobucket

Because of the half wall and the little windows above the stair well the loft gets a LOT of light, which I love. Natural light makes me very happy :-)

Photobucket

Photobucket

This is my view from the sofa ...

Photobucket

although it usually looks like this because *someone* thinks they're a lap dog ...

Photobucket

I used Ikea storage boxes to store our Wii controllers and games but mostly because I'm weirdo and hate to see cables, and putting the boxes there hid them.

Photobucket

This handsome little devil is one of my favorite accessories in the room!

Photobucket

Its not a large room (its about 12 x 12 feet) but we are happy we managed to cram so much into it!

I know the photos look calm and serene ... well this is a more accurate depiction of what's usually going on in here!

Photobucket

Never a dull moment around here!

Saturday, July 24, 2010

Best friends

This morning the dogs and I were bored while we waited for Josh to wake up so we had a photo shoot on the stairs. Zoey doesn't always cooperate because she is too spazzy but today she was good and posed for me just like Zeke does!

Photobucket

Photobucket
Two legged dogs


Photobucket

Photobucket

Photobucket

Photobucket
My favorite


Photobucket
Doesn't Zoey look like she's laughing in this one?

Friday, July 23, 2010

The Deck: part one

*Warning: this post is long and boring if you're not interested in other people's decks. Actually even if you are it might still be long and boring :-)

The weather forecast said it was supposed to be under 100 degrees this weekend so I decided to take Friday and Monday off so that I could have a relaxing 4-day weekend so that we could finally repair, power wash, and stain the deck, and replace the shade cloth cover. We could have done it over 2 weekends but we decided it would be best to just get it done in one weekend. (Plus I am easily distracted so its always best if I can start and complete a project quickly!)

We have a 3 part deck along the back of our house and to say it hasn't been looked after is an understatement. Think dirty wood without even a hint of stain or any other protective sealant. It could probably do with being replaced but we are hoping a little TLC will give it a few more good years.

I already posted about how we removed the partition on the right section but here's a refresher ...

This
Photobucket

to this
Photobucket

Then we turned our attention to railing on the left section. I have to warn you about this next pic. Its bad, really bad. This is what things looked like before we started doing any work in the back yard. Hideous is an understatement. And those rosebushes were so unruly they would grab onto your clothing as you walked by. They were also rotting, and diseased, and basically a huge mess.
(Side note: the listing for our house boasted 'beautiful, well maintained rosebushes line the back fence' - when we saw the rosebushes we literally laughed out loud.) Anyway, enough about the rosebushes - this is supposed to be about the deck!

Photobucket

Ewwwww!

Photobucket

I know the railing doesn't look that bad but it was so rickety you couldn't even lean on it and the dogs were constantly hitting their heads on the copper pipe as they jumped on and off the deck. The deck is not very high off the ground and doesn't require a railing so we decided to remove it.

The only problem with removing the partition and railing was that these little wood stumps were left sticking up. Josh sawed them off as close to the boards as he could but it was impossible to get them completely flat. They were also a bit of an eyesore.

Photobucket

Photobucket

(Yes, that's a dog pool! Too bad our dogs dont really like it.)

We had the great idea to just pop off the ends, take the affected boards off, saw off the stumps, replace the affected boards with new ones, and then pop the ends back on. Wellllll it wasn't that simple.

Josh worked on it one day this week while I was at work and I came home to this:

Photobucket

Photobucket

Yikes!

The ends pretty much fell apart as Josh was removing them, there were rusty nails everywhere and the support structure came off with the pieces he removed.

That was when we realized we had a 4 day job on our hands! We also realized we needed a lot more wood!

The good news is day 1 went well and we got all the broken pieces replaced. The bad news is we still have a LOT to do in the next 3 days!

Oh and I almost forgot - this is the shade cloth we will be removing and replacing (as viewed from an upstairs window):

Photobucket

Hopefully I'll have progress to share tomorrow!

Thursday, July 22, 2010

Sunny sunflowers

Last Saturday it was so hot in our house (even with the AC on!) we decided to take a little drive and enjoy the car's more effective air conditioning.

Brentwood was originally a farming town and although a lot of the land has been built up over the past 10 years its only a short drive to get to the back roads and fields.

We were driving around checking out the corn, tomato, and alfalfa fields when we came across this wild sunflower patch. It was so pretty I asked Josh to pull over so I could take a few pics.

Photobucket

I loved how the sun's rays softly filtered through the flowers and leaves.

Photobucket

Photobucket

The clear blue sky and the cheery yellow flowers looked so summery together.

Photobucket

The sun was high in the sky and created such a cool sun flare.

Photobucket

We had the piggies on the drive with us and when I turned around to get back in the car I was greeted by this sight ...

Photobucket

Love that smile!

Saturday, July 17, 2010

Our new friend

About a week ago a stray cat adopted us. We've seen her around the neighborhood before but last weekend she showed up in our yard crying and wouldn't leave. She was very shy and took off running every time we went outside but as soon as we came back in she was back on the deck.

Photobucket

After hanging around for 2 days straight we figured she'd been abandoned so we offered her food and water. She gobbled up both right away, the poor little thing. I know you should never feed a stray or they'll never leave but its 100+ outside and we just felt so bad for her. I've been asking around to see if anyone wants her but so far there are no takers.

Fast forward a week and she's warming up to us. If we walk slowly up to her she lets us pet her. She's very sweet, just timid. It also doesn't help that our dumb dogs keep trying to play with her ... and by play I mean chase.

On Friday she modeled for me.

Photobucket

Photobucket

Isn't she a pretty little thing?

Photobucket

This was a first: the dogs sitting and looking at her but not chasing. They really wanted to but they were told to 'sit' and 'leave it' ... and they actually listened for a change.

Photobucket

Photobucket

Photobucket

We definitely don't need another indoor cat but maybe we can have an outdoor cat?!

The loft: bits and pieces

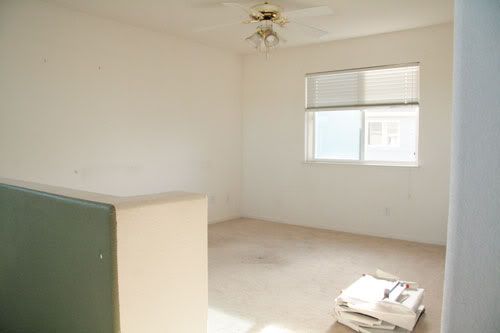
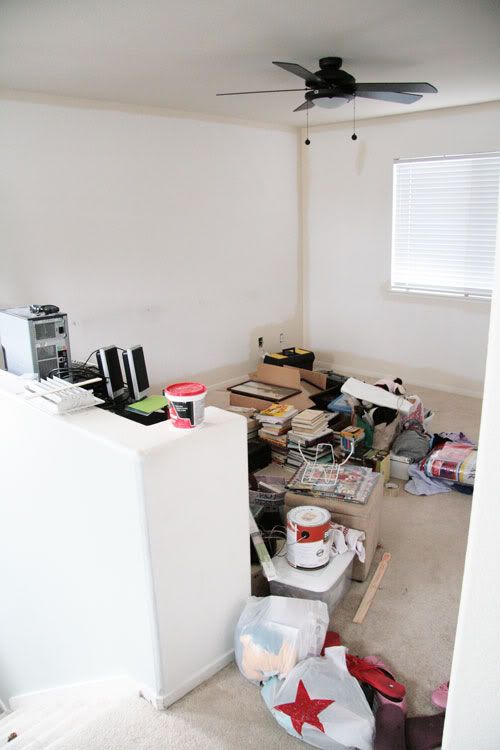
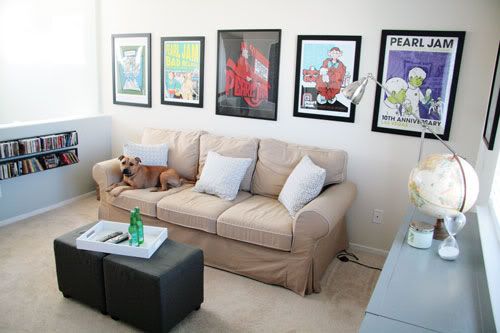
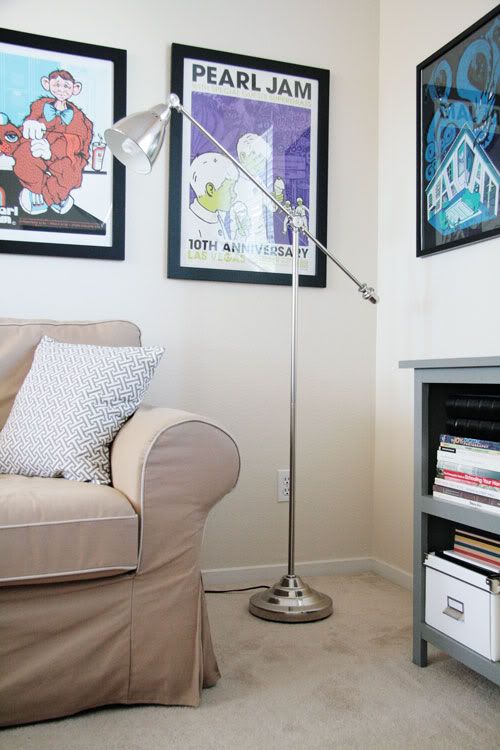
We are almost finished with the loft ... finally! It probably would have been done sooner if we didn't start working on the backyard at the same time but I lack the ability to just focus on one thing at a time. I just have to finish making a few throw pillows and then it will be all done. In the meantime I thought I'd show a few bits and pieces of the room.

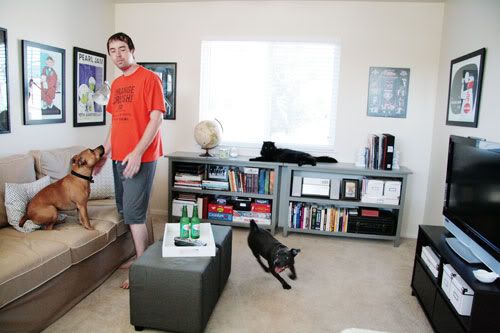
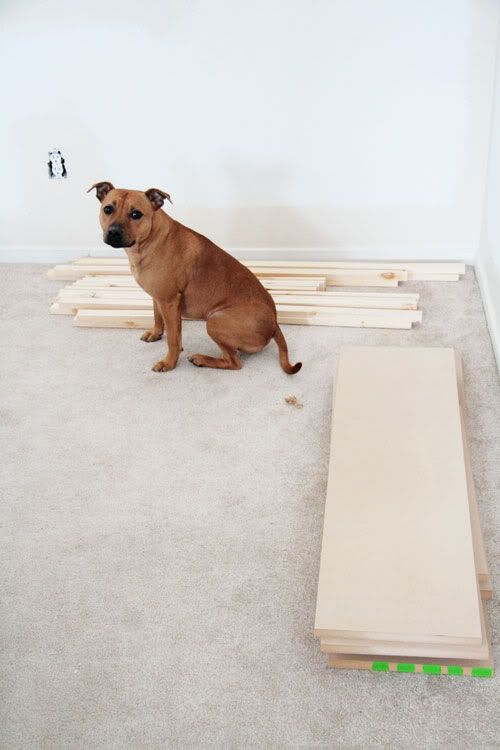
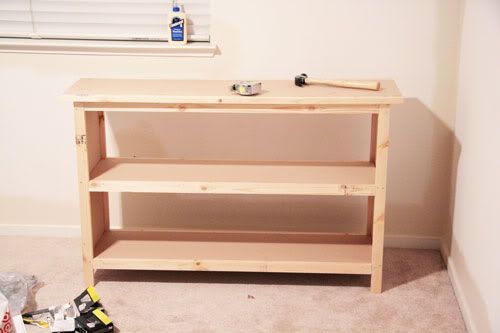
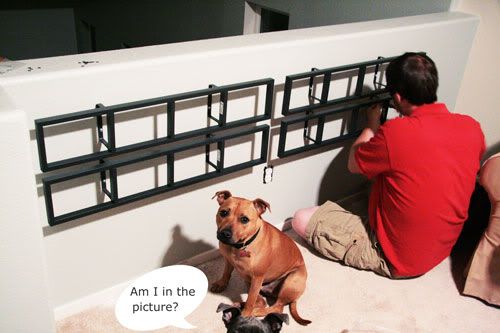
When I posted about the loft previously I think I mentioned that were planning on making some bookcases to store our books, photo albums, etc. We started with some MDF and pine trim (and a helper dog) ...

Photobucket

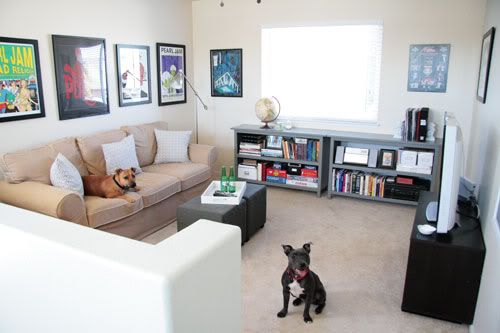
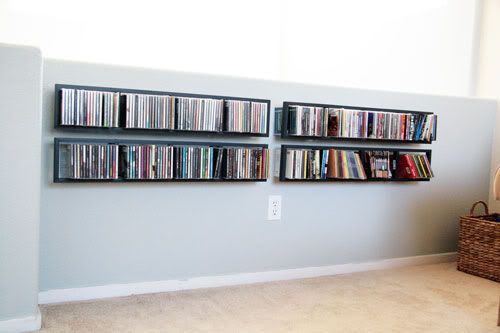
And after some trial and error we got to this point:

Photobucket

I always check the 'oops' paint section at hardware stores and scored a gallon of grey paint for $4 - we thought it would be perfect for the bookcases. We already had primer and polyurethane from other projects.

Photobucket

Not bad for 2 novices huh?!

Photobucket

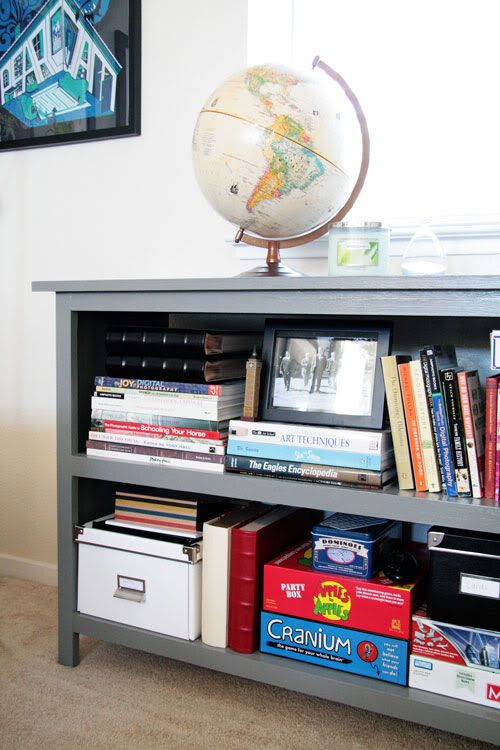
Total cost for 2 bookcases was $60. There's no way we could have bought them for that price - not even from Ikea!

See that globe on the bookcase? I got it at Goodwill for $9.99! Josh mentioned that he wanted one but every one we saw was a bit pricey so we gave up on that idea ... until one day I stopped by Goodwill on the way home from work and saw that lovely globe. Its a bit rickety, but hey, you cant beat the price!

Photobucket

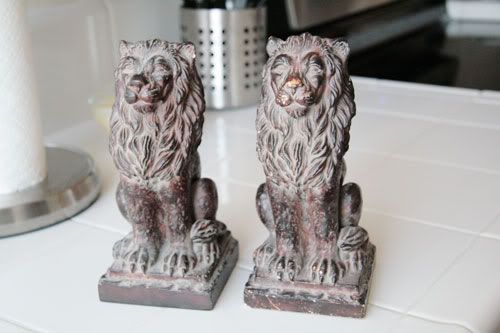
On the other end of the bookcases are 2 lions supporting our Pearl Jam vinyl collection. I bought a dresser off Craigslist a couple of months ago and the seller was throwing out the lions. I don't blame her because they were pretty hideous. I asked her if I could have them and she happily gave them to me - she probably thought I was a bit odd for wanting them.

Photobucket

A few coats of white spray paint later and they are fabulous! They're probably not every one's cup of tea but I really love them.

Photobucket

Photobucket

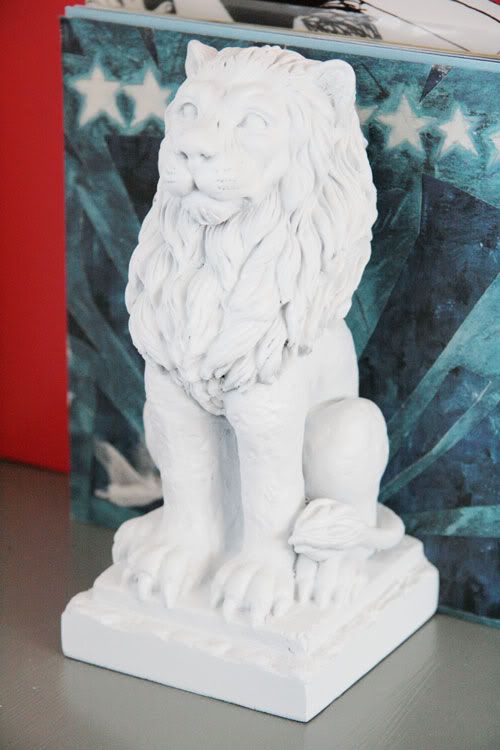
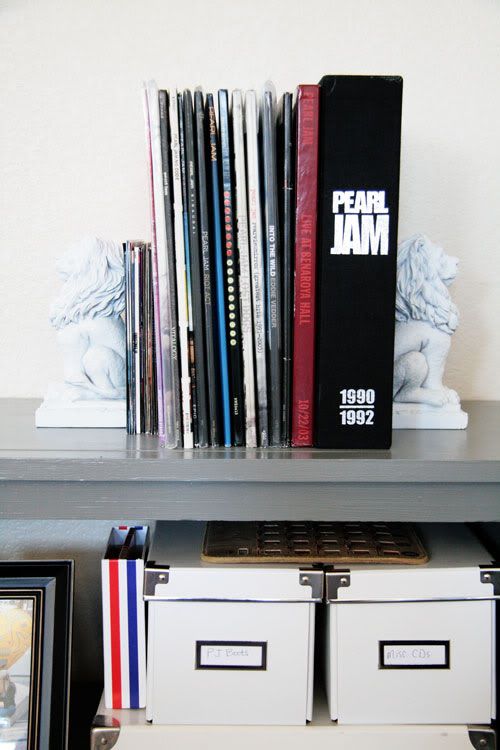
Not to mention they came in handy when we realized the records were too tall for the shelves (oops) and had to stand on top.

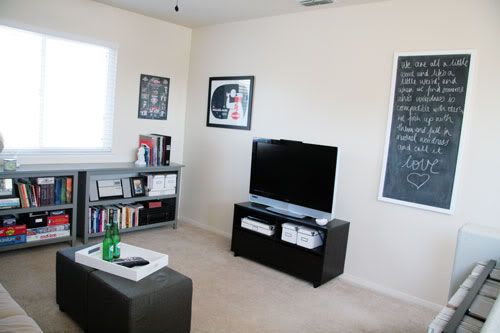
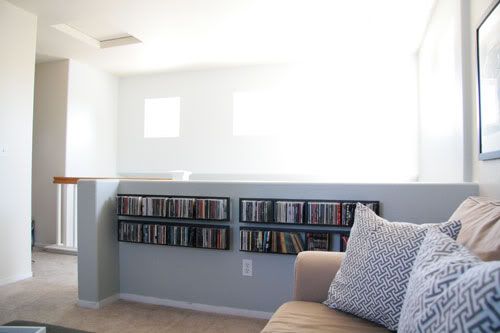
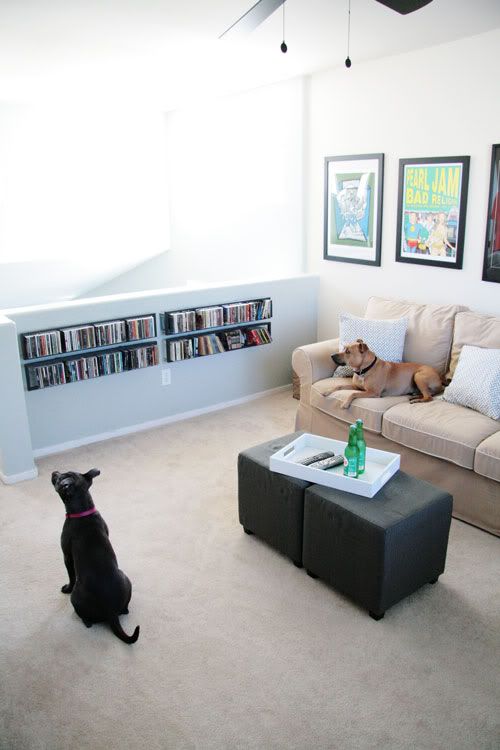
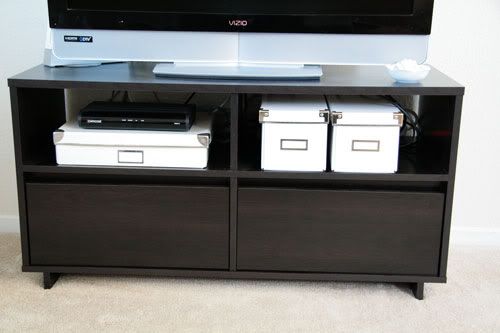
The last thing we needed to figure out was CD storage. Josh's CDs are all in binders but I still have mine in the cases so they needed a place to live. We found the CD racks at Ikea. I was completely lost about how to store them and I've never seen a CD wall rack that didn't scream "college dorm" but when we saw these dark gray, metal guys I didn't instantly hate them. Then I saw the price tag: $6.99 ... sold! Four came home with us. They fit perfectly in the little nook the half wall makes and I actually like the way they look on the wall.

Photobucket

Photobucket

I still have to touch up where I got paint all over the baseboard but I absolutely cant stand painting baseboard above carpet so I'm going to put that off as long as possible.

I had this great idea that we should have a chalk board in the loft. Josh agreed so off we went to Home Depot for supplies. I thought the chalk board should be 4 feet wide by 6 feet tall. Josh laughed in my face. After I picked up a piece of plywood 2 feet wide by 4 feet high I realized he was right - I have no idea why I thought we needed such a monstrous chalkboard.

We started with these supplies:

Photobucket

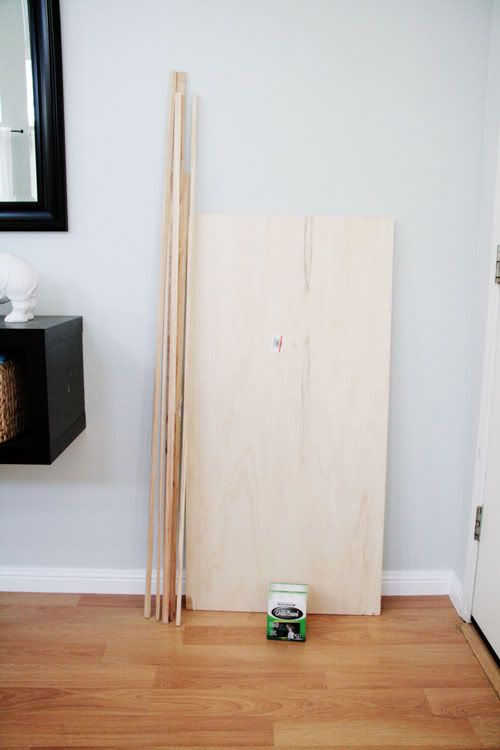
(2 ft x 4 ft piece of plywood, trim, chalkboard paint)

And now we have this lovely, non-ridiculously sized chalk board:

Photobucket
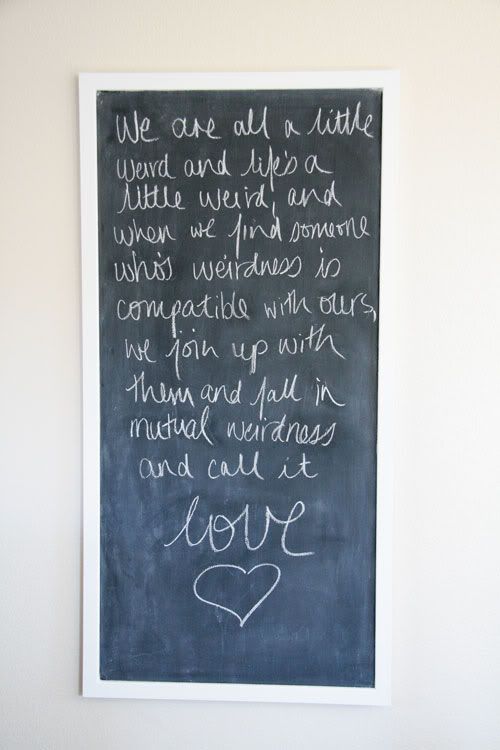
(please excuse my terrible handwriting)

I found the quote on a blog somewhere and it describes us perfectly :-)

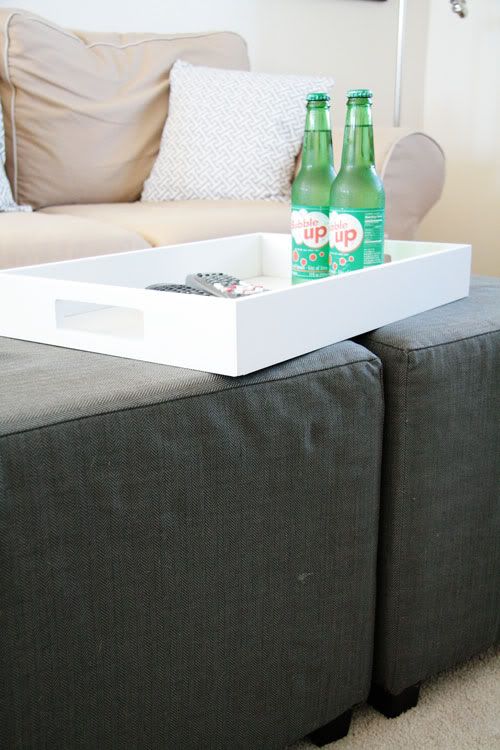
So that's what we have going on in the loft. Now I just have to get my lazy butt over to my sewing machine so I can finish the throw pillows!